So, you finally did it. You welcomed a robot vacuum into your home, handed over the tedious chore of daily floor cleaning to your new automated friend, and reclaimed your free time. It feels like living in the future, right?
But here is a quick reality check: just because your robot vacuum is autonomous doesn’t mean it’s completely self-sufficient.
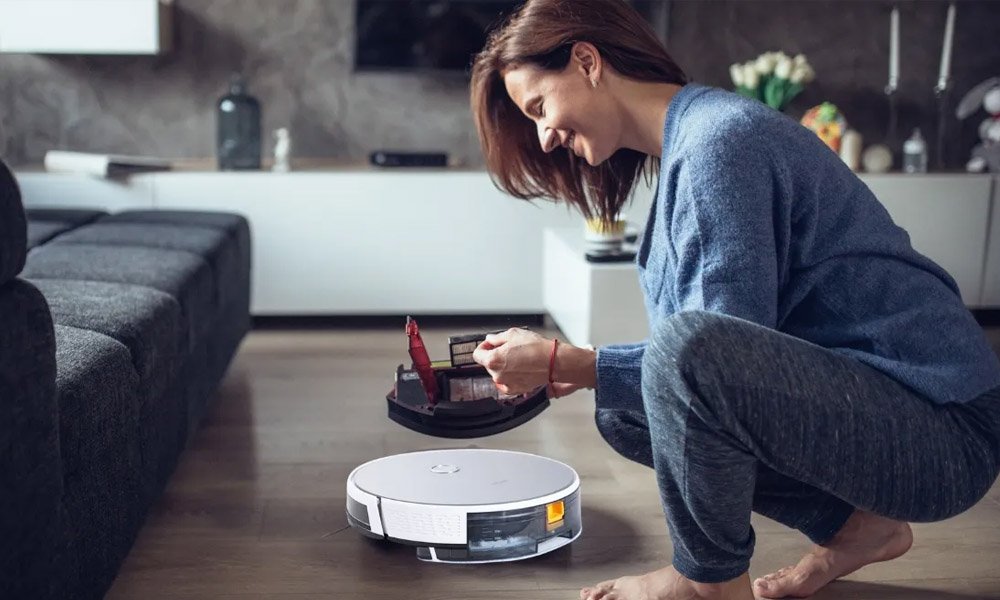
Think of your robot vacuum—like the high-performance MOVA Robot Vacuum—as a miniature appliance that tackles a mountain of dust, hair, and debris every single day. Over time, that buildup clogs its sensors, tangles its brushes, and strains its motor. Without proper maintenance, its suction drops, its battery drains faster, and its lifespan is drastically cut short.
If you want to keep your smart home investment running like new for years to come, you need a maintenance routine. Here is your definitive, practical guide to deep cleaning and maintaining your robot vacuum.
The “Why It Matters” Breakdown
Before we dive into the dirt, let’s look at why a 15-minute maintenance session saves you hundreds of dollars in the long run.
- Saves the Motor: When hair wraps tightly around the brush roll, the motor has to work twice as hard to spin it. This causes overheating and premature motor failure.
- Preserves Suction Power: A clogged filter restricts airflow. You might think your vacuum is losing its power, but it’s usually just suffocating behind a wall of dust.
- Prevents Navigation Glitches: Robot vacuums rely on optical and infrared sensors to navigate. Dirty sensors make the robot “blind,” causing it to bump into walls, miss rooms, or tumble down stairs.
Step-by-Step Deep Cleaning Guide
For the best results, turn off your robot vacuum and remove it from its charging dock before you begin.
Step 1: Empty and Wash the Dustbin
While you probably empty the dustbin regularly, a deep clean requires a bit more effort.
- Empty the dry debris into the trash.
- Rinse the dustbin with lukewarm water to remove stubborn, caked-on dust.
- Crucial Step: Let the dustbin air dry completely (at least 24 hours) before putting it back. Never put a wet dustbin into a robot vacuum, as moisture can destroy the internal electronics.
Step 2: De-Hair the Main Brush Roll
The main roller brush is the heart of the vacuum’s cleaning power, and it’s also a magnet for hair, threads, and carpet fibers.
- Remove the brush guard and lift out the main roller.
- Use the cleaning tool (usually included with your vacuum, featuring a small blade) to slice through wrapped hair along the designated grooves.
- Don’t forget to check the bearings on the ends of the brush; hair loves to tightly coil around these caps, which can melt the plastic if left unchecked.
Step 3: Clean or Replace the HEPA Filter
Your vacuum’s filter catches microscopic allergens, preventing them from blowing back into your indoor air.
- If it’s non-washable: Tap it gently against the inside of your trash can to knock loose the fine dust. You can also use a handheld vacuum to suck the dust out of the pleats.
- If it’s washable (like many MOVA models): Rinse it under cold water until the water runs clear. Do not use soap or scrub the delicate fabric. Ensure it is 100% dry before reinsertion to prevent mold and airflow blockage.
Step 4: Detangle the Side Brushes
Side brushes spin rapidly to flick dirt from corners into the vacuum’s path. Because they sit low, they easily trap long hair around their bases.
- Unscrew or pop off the side brushes.
- Pull off any hair wrapped around the peg.
- Pro-tip: If the plastic bristles are bent or warped, dip them in hot water for a few minutes. They will magically straighten out back to their original shape!
Step 5: Wipe Down the Sensors and Charging Contacts
A blind robot is an inefficient robot. Your vacuum features cliff sensors on the bottom (to prevent falling) and wall/mapping sensors on the front and sides.
- Take a soft, dry microfiber cloth (never use harsh chemicals or wet wipes).
- Gently wipe down all the sensor windows.
- Clean the silver charging plates on the bottom of the robot and the corresponding pins on the charging dock. Dust buildup here can prevent the vacuum from charging correctly.
The Golden Maintenance Schedule
You don’t need to do a full deep clean every single day. To make smart home maintenance manageable, follow this quick reference checklist:
| Component | Frequency | Action | Replacement Timeline |
| Dustbin | Every 1–3 cycles | Empty & wipe | N/A |
| Main Brush | Every 1–2 weeks | Remove hair and debris | Every 6–12 months |
| Filter | Once a week | Tap out dust / Rinse | Every 2–3 months |
| Side Brushes | Every 2 weeks | Detangle and clean | Every 3–6 months |
| Sensors & Contacts | Once a month | Wipe with dry cloth | N/A |
Smart Habits to Extend Lifespan
Beyond physical cleaning, how you treat your robot in your daily routine matters just as much.
Pre-Prep Your Floors: Robot vacuums are smart, but they aren’t human. Before running a cycle, do a quick sweep of the floor for “robot traps”—loose charging cables, stray socks, pet toys, and tassels on rugs. Forcing a vacuum to choke on a cable stresses the battery and the drivetrain.
Battery Best Practices: Lithium-ion batteries thrive on regular use. Keep your robot living on its charging dock when not in use so it stays topped off. If you are going away on a long vacation, fully charge the robot, turn off its main power switch completely, and store it in a cool, dry place.
Conclusion: Let Tech Work for You, Safely
A smart home is all about convenience, but even the smartest gadgets require a little human partnership. High-quality appliances like the MOVA Robot Vacuum are built with incredibly durable engineering, but they still rely on you to keep their pathways clear.
By investing just 10 to 15 minutes every couple of weeks into this maintenance routine, you ensure that your floors stay spotless, your indoor air stays fresh, and your robot vacuum remains your faithful cleaning companion for years to come. Treat your robot well, and it will return the favor—one dust-free floor at a time!