Key Takeaways
- Define how the basement will be used before choosing finishes or furniture.
- Inspect for moisture, structural issues, utilities, and existing damage first.
- Resolve leaks, drainage, and humidity problems before covering walls or floors.
- Confirm local permits, safety requirements, emergency exits, and utility access.
- Create a flexible layout that can adapt to changing household needs.
- Choose durable materials that are appropriate for below-grade conditions.
- Plan lighting, ventilation, insulation, heating, cooling, and sound control.
- Include practical storage while keeping plumbing and mechanical systems accessible.
- Build a complete budget that includes permits, repairs, labor, materials, and contingency costs.
- Follow a logical remodeling sequence to reduce rework and unexpected problems.
A basement can become one of the most useful areas in a home when the project starts with practical planning. Before choosing finishes or furniture, define how the space needs to work and consider consulting a qualified basement remodeler for guidance on design, construction, and existing conditions. The most successful lower-level renovations prioritize dryness, safety, comfort, storage, and flexibility. Use this checklist to organize decisions in the right order, reduce avoidable rework, and create a finished basement that supports daily life for years to come.
Start With a Clear Purpose
Begin with the household problem that the basement should solve. It may need to function as a family room, office, guest area, gym, playroom, hobby room, media space, or a combination of uses. List the activities that need dedicated space, identify nonnegotiable features, and think about how the room may change over the next five to ten years.
Inspect the Space Before Work Begins
Walk through the basement before finalizing a layout. Look for cracks, stains, musty odors, peeling finishes, uneven floors, damaged framing, and signs of past water entry. Measure ceiling heights, locate windows and stairs, and mark the water heater, furnace, electrical panel, plumbing lines, drains, and other equipment that will require future access. If the project includes framing, plumbing, electrical work, or a major layout change, a professional basement remodeling service can help translate those observations into a workable scope before construction begins.
Solve Moisture Problems First
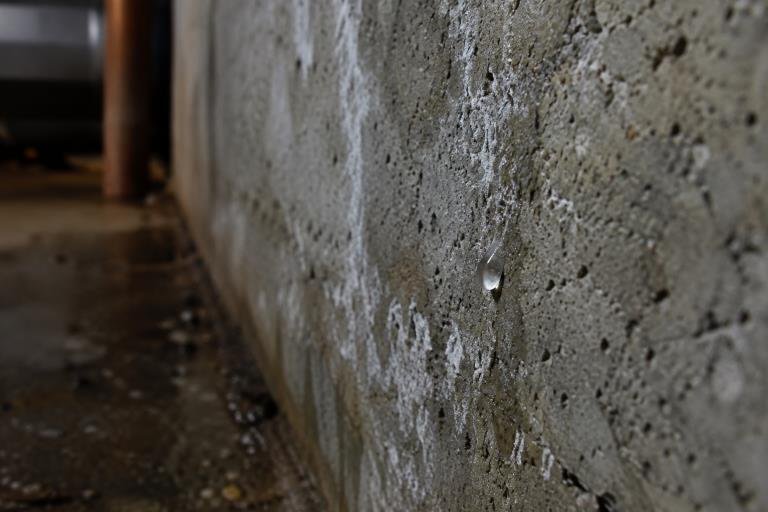
Never cover a moisture problem with new walls, flooring, or cabinetry. Musty smells, dark stains, white mineral residue on masonry, swollen trim, condensation, and standing water near the foundation all deserve attention before finishes are installed. The Environmental Protection Agency emphasizes that moisture control is the key to mold control, making drainage and humidity management essential parts of basement planning.
- Check grading to confirm water moves away from the foundation.
- Clean gutters and extend downspouts away from the house.
- Inspect window wells, sump equipment, drains, and plumbing connections.
- Address leaks, seepage, or persistent condensation before closing walls.
Check Safety and Code Requirements
Local requirements can affect ceiling height, stair details, electrical work, ventilation, smoke alarms, plumbing, and emergency escape openings. A bedroom may need an approved emergency exit, while a bathroom below the main sewer line may require specialized drainage equipment. The layout of a walk-out, daylight, or fully below-grade basement can also affect natural light, access, and planning options.
Important Safety Questions
- Will any new wall block access to utilities or shutoff valves?
- Are stairs stable, well-lit, and easy to use?
- Are outlets, lighting, alarms, and ventilation included in the plan?
- Does the proposed sleeping area meet local escape requirements?
Plan a Flexible Basement Layout
Divide the basement into zones without turning it into a row of small, dark rooms. Place gathering areas near the best natural light, separate noisy activities from quiet work areas, and keep plumbing fixtures close to existing lines when practical. Partial walls, shelving, rugs, and furniture can define spaces while preserving openness. Plan around actual furniture dimensions, circulation paths, and doors before framing begins.
Choose Materials for Below-Grade Conditions
Basement finishes should suit a space that may experience cooler temperatures, humidity changes, heavy traffic, and occasional spills. Choose flooring appropriate for the condition of the slab, use durable and washable wall finishes, and avoid trapping moisture against foundation walls. Select trim and storage materials that are easy to clean, especially near bathrooms, laundry areas, or exterior entries.
Improve Lighting, Airflow, and Comfort
Use layered lighting instead of relying on one central fixture. General lighting brightens the room, task lighting supports desks and hobby areas, and accent lighting adds warmth around seating, shelves, or artwork. Combine that plan with balanced heating and cooling, dehumidification when needed, insulation, quiet ventilation, and sound control between the basement and upper floors.
Build In Useful Storage
Plan storage before the walls are closed. Cabinets beneath stairs, closed toy and game storage, media built-ins, seasonal-item shelving, and sports equipment storage can keep the finished room functional. Leave access panels or removable components where future service to plumbing, wiring, or mechanical systems may be needed.
Set a Realistic Budget
Budget by category rather than focusing only on visible finishes. Account for design, permits, moisture repairs, framing, insulation, electrical work, HVAC, plumbing, drywall, flooring, trim, paint, storage, furniture, and technology. Keep a contingency reserve for conditions uncovered during demolition, particularly in older homes where drainage, wiring, or plumbing issues may not be visible at the start.
Follow the Right Remodeling Sequence
- Define the purpose, priorities, and budget.
- Inspect the space and resolve moisture or structural concerns.
- Confirm permits, safety needs, layout, and utility access.
- Complete rough plumbing, electrical, and HVAC work.
- Frame, insulate, close walls, and finish ceilings.
- Install flooring, trim, lighting, storage, fixtures, and furniture.
- Complete required inspections and a final quality review.
Avoid Common Basement Remodeling Mistakes
Common problems include finishing before fixing water issues, blocking utility access, overlooking humidity, choosing flooring without evaluating the slab, forgetting storage, relying on harsh overhead lighting, underestimating furniture clearances, and skipping required permits or inspections. Avoiding these mistakes early is usually easier than correcting them after finishes are installed.
Final Basement Remodeling Checklist
- Is the basement dry throughout the year?
- Have drainage, foundation, and humidity concerns been addressed?
- Does the layout support current needs and future changes?
- Are exits, alarms, stairs, and utility access properly planned?
- Do the materials suit below-grade conditions?
- Does the budget include permits and a contingency reserve?
- Is the construction sequence clear before work begins?
Conclusion
A finished basement should feel like a natural extension of the home, not an afterthought. By handling moisture first, confirming safety requirements, planning adaptable zones, choosing suitable materials, and budgeting for the full scope of work, homeowners can create a comfortable lower level that remains useful as their needs evolve. It is also important to consider lighting, ventilation, insulation, flooring, storage, and access to electrical outlets when planning the space. A basement may serve as a family room, home office, guest area, exercise space, hobby room, or combination of several uses so that flexible layouts can provide greater long-term value. Homeowners should also account for permits, drainage concerns, ceiling height, emergency exits, and potential repairs before construction begins. Taking time to plan these details can help reduce surprises during the project and create a finished basement that is comfortable, practical, and easier to maintain over time.