Key Takeaways
- Begin with comfort, moisture, safety, and energy concerns before selecting finishes.
- Use an energy assessment and recent utility bills to establish practical priorities.
- Consider air sealing, insulation, windows, doors, ventilation, and mechanical systems as interconnected parts of a single home.
- Include indoor air quality protection and realistic contingency funds in the remodeling plan.
- Use a phased approach when the full scope cannot be completed at once.
An energy-smart remodel is about more than updating cabinets, tile, or paint. It is an opportunity to improve comfort, manage moisture, reduce wasted energy, support healthier indoor air, and make the home easier to maintain. Whether the project involves one bathroom or a whole-house renovation, a thoughtful plan helps each improvement work with the next. Homeowners considering a practical, performance-focused approach can begin by discussing priorities with Magee Homes and organizing the project around the home’s actual condition.
The most successful remodeling plans start with problems, not products. A cold bedroom, a damp bathroom, high utility bills, drafty doors, or rooms with uneven temperatures may point to issues behind the walls, above the ceiling, or within the heating and cooling system. Addressing those concerns early can help prevent a beautiful new room from becoming an expensive missed opportunity.
Why Energy Performance Belongs in Every Remodel Plan
A remodel should improve how a house feels as well as how it looks. Drafty air, condensation, outside noise, stale air, and uneven temperatures are often linked to air leaks, poor insulation, damaged materials, inadequate ventilation, or aging equipment. A new kitchen or bathroom can still be uncomfortable if the larger performance problems remain unresolved. Integrating energy decisions into the design stage makes it easier to coordinate electrical work, ventilation routes, insulation details, and material choices before surfaces are closed.
Step 1: List Problems Before Choosing Products
Walk through the home room by room and write down what is not working. Note rooms that are too hot or cold, windows that fog or stick, doors with noticeable drafts, bathrooms that remain damp, water stains, musty smells, and recurring repair issues. Gather a year of utility bills when possible, along with repair records and photos of visible damage. This simple record gives designers and contractors a clearer starting point than a list of finishes alone.
Step 2: Get an Energy Baseline
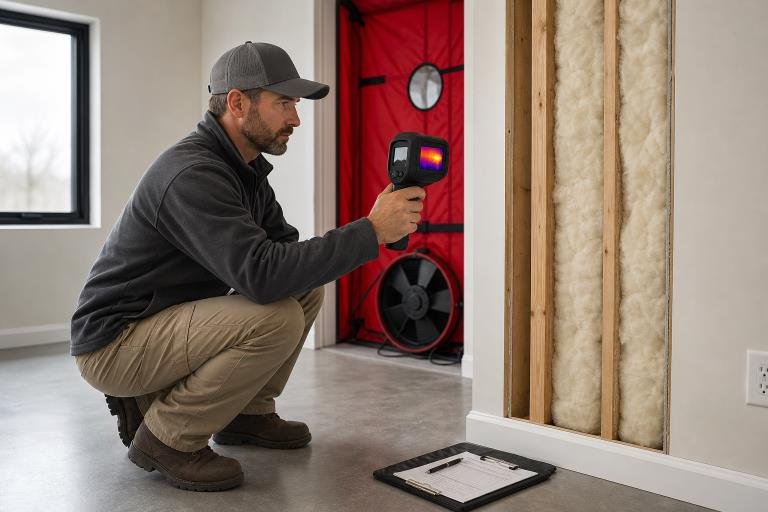
A home energy assessment can identify where the home loses conditioned air and where upgrades may have the greatest impact. Depending on the home, an assessment may review insulation, air leakage, ductwork, heating and cooling equipment, water heating, windows, doors, and past energy use. Blower-door testing measures air leakage, while infrared imaging can help locate temperature differences that suggest missing insulation or gaps. The U.S. Department of Energy’s home upgrade guidance is a useful resource for understanding assessment-based priorities and available upgrade categories.
Step 3: Use an Envelope-First Strategy
The home envelope includes the roof, walls, foundation, insulation, windows, doors, and the details that control air and water movement. As a planning principle, it often makes sense to understand the envelope before replacing major heating or cooling equipment. A smaller, better-sealed, well-insulated home may need a different equipment solution than a leaky one.
- Repair active leaks, rot, drainage failures, and moisture problems.
- Seal accessible gaps around penetrations, framing transitions, and openings.
- Review insulation levels, coverage, and condition.
- Evaluate windows and doors for damage, drafts, operation, and water management.
- Plan heating, cooling, and ventilation changes after the envelope is understood.
Step 4: Choose Windows and Doors for Performance
Windows and doors should be chosen for more than appearance. Compare operating style, frame material, glazing, weather exposure, security, and performance labels. A west-facing room may need a different glazing strategy than a shaded bedroom, while a frequently used entry door needs durable weather sealing and reliable operation. Installation quality is equally important. Proper flashing, drainage, air sealing, and interior finishing help protect the wall assembly and prevent drafts around an otherwise high-quality product.
Step 5: Plan Kitchens and Bathrooms for Efficiency and Comfort
Kitchen Planning Points
- Use layered lighting with separate controls for task, ambient, and accent lighting.
- Confirm appliance locations, electrical loads, plumbing, and outlets before ordering cabinets.
- Plan range hood ventilation early, including a practical route to the exterior where appropriate.
- Select durable, easy-to-clean materials that suit the household’s daily routine.
Bathroom Planning Points
- Prioritize waterproofing, sound plumbing, and a properly vented exhaust fan before tile or trim.
- Choose water-saving fixtures that still provide the desired comfort and function.
- Consider slip resistance, storage, lighting, and future accessibility needs.
- Investigate damaged subfloors, old supply lines, and recurring condensation before installing finishes.
Step 6: Protect Indoor Air Quality During Construction
Remodeling can introduce dust, odors, moisture, and chemical emissions into occupied areas. Plan for durable work-zone barriers, daily cleanup, protected HVAC registers, and ventilation that directs pollutants outdoors. Keep children, pets, and people with respiratory concerns away from active work areas whenever possible. In older homes, determine whether lead-based paint, asbestos, mold, or other hazards require specialized handling. The EPA’s indoor air quality guidance for remodeling offers practical safety measures to contain dust and address underlying moisture problems.
Step 7: Build a Realistic Budget
Separate the budget into three categories:
- Must do:leaks, unsafe wiring, structural repairs, failed waterproofing, and damaged plumbing.
- High value:air sealing, insulation, ventilation, efficient lighting, and durable repairs.
- Nice-to-have:specialty finishes, decorative hardware, extra trim, and upgrades that can wait.
Ask whether estimates include design, permits, inspections, disposal, delivery, cleanup, and protection of occupied spaces. Set aside a contingency for hidden conditions, particularly where demolition is planned or the home is older. Compare written scopes line by line rather than choosing solely by the lowest total.
Step 8: Set the Project Sequence Before Work Begins
Sequence prevents rework. First, inspect the home and define goals. Next, address structural, moisture, and safety issues. Finalize layouts and major selections before demolition, then coordinate permits and trades. Complete plumbing, electrical, HVAC, framing, and ventilation work behind the walls before insulation and drywall. Finish with cabinets, fixtures, flooring, paint, trim, and final testing. For example, electrical locations should be confirmed before drywall, and bathroom exhaust ducting should be installed before the ceiling is closed.
Questions to Ask Before Signing a Remodeling Agreement
- What is included in the written scope, and what is excluded?
- Who handles permits, inspections, scheduling, and trade coordination?
- How will hidden damage, allowances, and requested changes affect cost and timing?
- How will dust, debris, daily cleanup, pets, children, and occupied areas be managed?
- What decisions and materials must be finalized before work starts?
- What final checks will confirm that the ventilation, fixtures, and other systems are working properly?
Common Planning Mistakes to Avoid
Avoid selecting finishes before solving moisture or layout issues. Do not replace windows without reviewing the surrounding water and air sealing. Do not make a tighter home without considering ventilation. Starting demolition before materials are ordered and decisions are made can cause delays, while evaluating rooms in isolation can overlook whole-home concerns such as electrical capacity, insulation continuity, and HVAC performance.
When a Phased Remodel Makes Sense
Phasing can make a major remodel manageable, provided the full plan is considered at the beginning. Start with safety, structure, leaks, and moisture control. Continue with air sealing, insulation, windows, and doors. Move next to the kitchen, bathroom, or layout work, then complete lighting, storage, finishes, and cosmetic updates. This approach helps avoid installing a new finish that later must be removed for wiring, plumbing, or insulation work.
Frequently Asked Questions
Should energy improvements come before cosmetic work?
Often, yes. Repairs, moisture control, air sealing, insulation, and ventilation usually protect the value of decorative work that follows.
Are new windows always the best energy upgrade?
Not always. Results depend on existing conditions, installation quality, air leakage, insulation, climate, and the home’s heating and cooling systems. Window replacement may greatly improve comfort even when utility savings vary.
How can homeowners stay in the house during remodeling?
Plan temporary cooking or bathing arrangements, sealed work zones, access routes, daily cleanup expectations, storage, and clear safety rules for pets and children before construction begins.
Conclusion
An energy-smart remodel begins with evidence, priorities, and a realistic sequence. Homeowners do not need to complete every improvement at once, but each phase should support the next. By connecting comfort, energy use, moisture control, ventilation, safety, and long-term maintenance, a remodel can create a home that looks better, feels better, and performs better for years to come.