Somewhere between knitting and painting, there’s a craft that’s been quietly taking over TikTok. The #punchneedle hashtag had accumulated 2.3 billion views as of May 2026, and that number keeps climbing. Short videos show a hollow needle pushing loops of yarn through taut fabric, a simple, repetitive motion that produces textured, colorful work in what looks like minutes. Watching one, most people think the same thing: “Could I actually do that?”
Yes. You can. And you probably could finish your first piece in a single afternoon.
This guide covers the full beginner journey including what punch needle actually is, what you need to buy, how a first session feels, and the few mistakes worth knowing about in advance. If you’ve been curious but weren’t sure where to start, this is where you start.
What Punch Needle Embroidery Actually Is (and Why It’s Different)
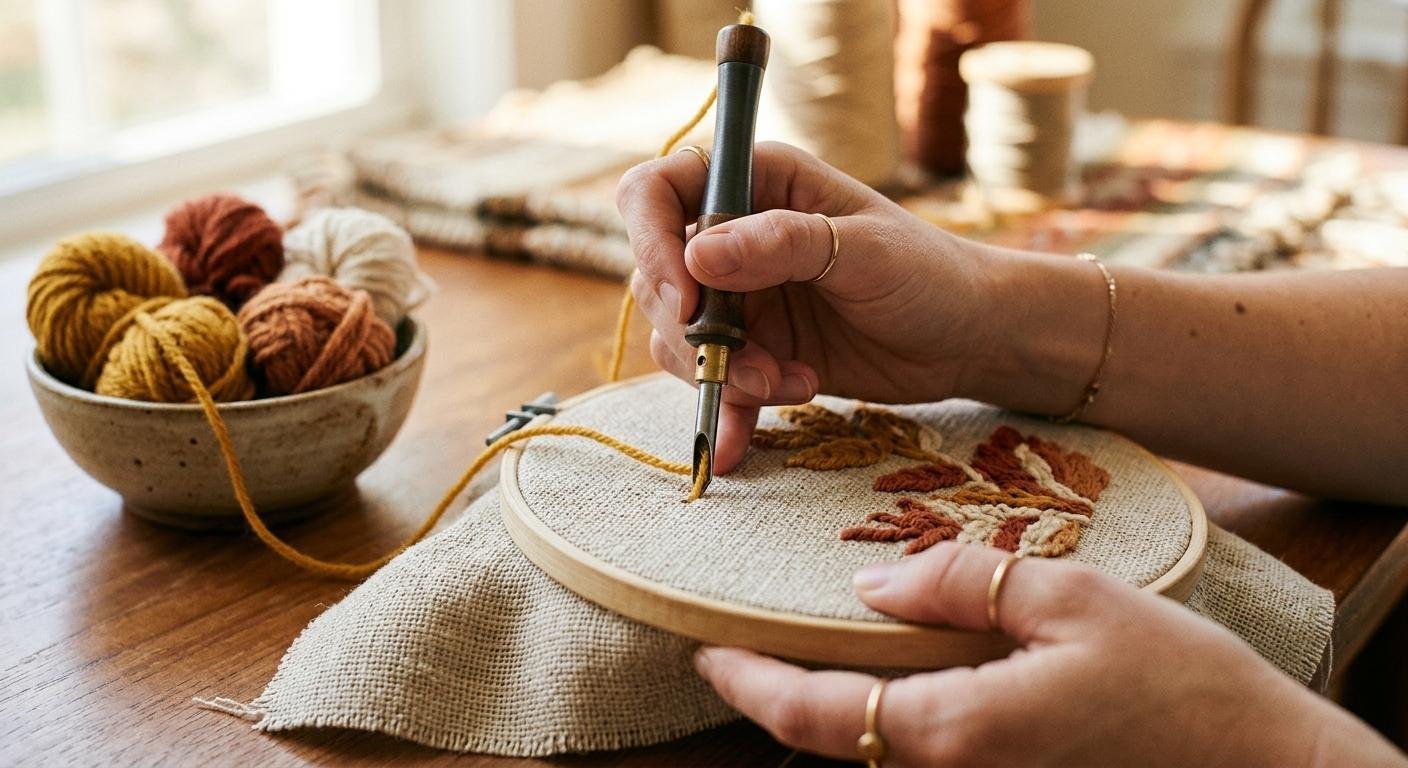
Punch needle is a fiber art technique where a hollow-tipped needle pushes yarn or thread through tightly woven fabric, usually monk’s cloth or weaver’s cloth, one loop at a time. Each loop anchors itself on the back through fabric tension, which means the pile builds on the front without a single knot. That’s actually the best part. You work from the back of the fabric, and if you don’t like a section, you just pull the yarn back out and start again. No knot-picking, no frustration, no wasted hours.
Compare that to cross-stitch, where you’re counting threads and reversing mistakes is genuinely painful, or regular embroidery, where pulling the wrong stitch can mean re-threading and re-knotting from scratch. Punch needle doesn’t punish you for experimenting. That’s why it catches people off guard – it looks like it should be harder than it is.
The technique itself dates back centuries, rooted in rug-making traditions across multiple cultures. Its current revival has a lot to do with social media and a broader shift toward hands-on creative hobbies. A 2024 American Psychiatric Association survey found that around 46% of Americans use creative activities – including fiber arts – to relieve stress or anxiety. That figure isn’t surprising once you’ve actually sat down with a hoop and a needle. The rhythm of the process does something to your brain that’s hard to explain until you experience it.
Getting started is genuinely easy when you have the right tools from the beginning. The biggest trap is buying supplies individually without knowing which needle gauge works with which yarn weight – you can end up with a setup that doesn’t work at all. Starting with a punch needle starter kit that bundles compatible tools together skips the compatibility guesswork entirely and gets you to actually making something on day one.
What You Need to Get Started
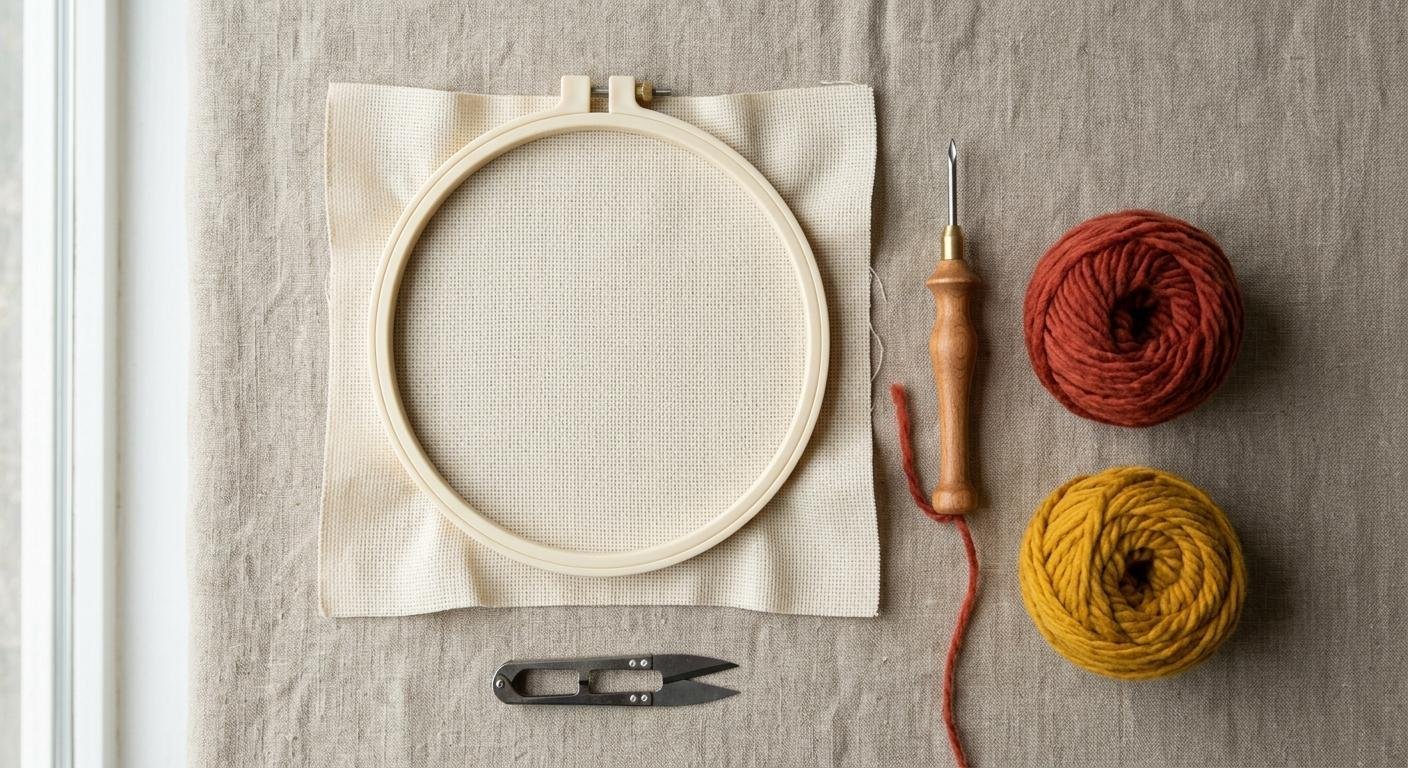
Four items make up the core setup, and each one has a specific job:
- Foundation fabric has to be a woven material, not a knit. Monk’s cloth with a 12-14 count grid is the standard recommendation for beginners because the open weave lets the needle pass through cleanly and holds loops securely. Weaver’s cloth works too. Stretch fabric or anything with elasticity won’t hold tension and your loops will pop out.
- The hoop matters more than most people expect. Standard embroidery hoops loosen over time and can’t maintain the tension punch needle requires. You want a heavy-duty plastic punch needle hoop specifically – it screws down to stay drum-tight. If the fabric has any give, your loops won’t anchor and will slide out when you lift the needle.
- Needle choice affects everything. An adjustable punch needle lets you change the loop height (which controls pile depth and texture) and accommodates different yarn thicknesses. Yarn gauge has to match the needle size or loops won’t form correctly. A thin yarn through a wide-gauge needle produces uneven, floppy loops.
- Yarn for beginners should be worsted-weight wool or cotton. Both are forgiving and easy to control. Avoid anything too thin or slippery at first – it makes threading the hollow needle stem unnecessarily fiddly.
Your First Punch Needle Session: What the Process Actually Feels Like
The actual workflow has about six steps, and they’re not complicated.
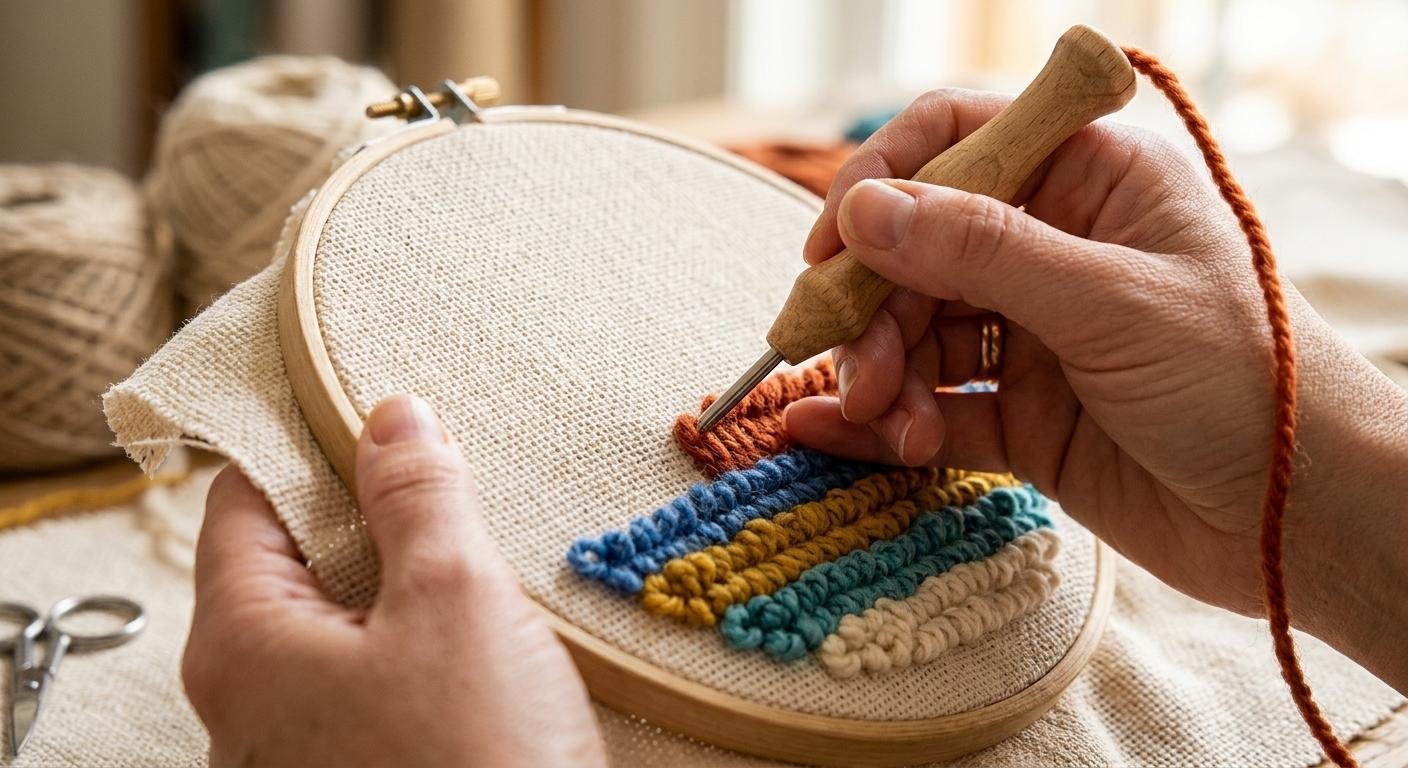
First, transfer your design to the back of the fabric – because that’s the side you work from. A light box or bright window works for tracing. Then stretch the fabric into your hoop and tighten it until it’s absolutely drum-tight. If you can press the center and feel any sag, it’s not tight enough.
Thread the yarn through the hollow stem of the needle and out through the eye at the tip. Hold the needle like a pencil with the open end facing the direction you’ll travel. Punch straight down until the handle nearly touches the fabric surface, then glide to the next stitch without lifting the tip off the cloth. That gliding motion is the thing most beginners don’t expect – you’re not hopping between punches, you’re skimming. Hopping breaks the loop sequence.
Outline your shapes first, then fill inward with a spiral. When you want to change direction or color, just pull the yarn gently back through the eye and clip it. No knot. No ceremony.
What surprises people most is how meditative the rhythm feels once you’re moving. It’s repetitive in the best way – the kind of repetition that quiets other thoughts. This connects to something real about how movement and creative engagement interact: as we’ve written about in how active play and movement fuel creative thinking, physical rhythm and creative output are more closely linked than most people assume. In craft, that shows up as the focused, almost hypnotic state experienced punch needle makers describe.
The Craft Industry Alliance’s 2025 industry review noted that Michaels’ Nick Bertram observed a clear “increase in engagement from younger customers” discovering the mental health benefits of handcrafting. Punch needle, with its fast feedback loop and low barrier to undo mistakes, fits that pattern exactly.
Common Beginner Mistakes (and Simple Fixes)
Most punch needle problems come from one of four things, and they’re all fixable once you know what to look for.
Loose fabric is the most common. If your loops keep popping out or falling flat after you finish a section, the hoop tension is the cause. Tighten until you could, in theory, bounce a coin off the surface. Use a punch-specific hoop, not a standard embroidery hoop.
Not punching deep enough is the second issue. If the handle doesn’t nearly touch the fabric on each punch, the loop isn’t forming at the right depth and won’t anchor. It feels a bit aggressive at first, but you do need to go all the way down.
Hopping the needle between stitches instead of gliding causes broken sequences and uneven pile. Keep the tip skimming the fabric surface as you move from stitch to stitch. Think of it as dragging, not lifting and placing.
Yarn tension is the fourth issue. Holding the yarn taut with your free hand restricts the flow and produces tight, inconsistent loops. Let the yarn feed freely from a yarn bowl or cone. It should trail loosely into the needle with no resistance.
And one more, specific to beginners: picking a design that’s too complex. Intricate color gradients and tiny details require consistent technique that takes a few sessions to develop. Start small – 6 inches or less, simple shapes, two or three colors max.
Choosing Your First Project and Pattern
Size is the single biggest variable in how your first project feels. Keep it at 6-8 inches across. Anything larger means more sessions, more time before you see the finished result, and more opportunity to lose momentum.
Good beginner projects include small wall hangings, simple geometric shapes, or a single botanical motif. These have enough visual interest to stay fun but don’t demand precision at the early stage when your punch depth and stitch spacing are still becoming consistent.
Color choice matters more than technique at this stage – a bold, well-chosen palette can make a simple design look genuinely impressive. Warm palettes (terracotta, mustard, cream) work well for home decor. High-contrast combinations (deep navy against warm white) produce strong graphic wall art. The same principles that apply to any visual design apply here. If you’re not sure where to start with color, the approach in choosing colors that reflect your personal aesthetic translates directly to yarn and textile choices.
The Craft Industry Alliance’s 2026 predictions note that personalization and self-expression are driving growth across craft categories, with makers investing specifically in handmade pieces that carry individual identity. That’s the direction punch needle naturally points you – toward work that’s genuinely yours.
What Punch Needle Can Become (Beyond the First Project)
Once the basic technique is solid, the craft opens up in several directions. Routine and repetition help turn the basic motions of punch needle into second nature. As your consistency improves, taking on bigger projects becomes a far less intimidating step.
Loop height is the first variable to experiment with. Higher loops produce more texture and a more sculptural, rug-like surface. Lower loops sit flatter and work better for fine-detail designs or framed art. Adjusting loop height mid-project creates dimension – some makers use three or four heights within a single piece.
Scale is the other lever. Moving from a 6-inch wall piece to a full rug is a natural progression, and the core technique doesn’t change – just the size of the needle, the weight of the yarn, and the amount of time.
The fine art dimension of punch needle is worth knowing about early, even as a beginner. Toronto-based textile artist Adrienna Matzeg’s “Scenic Route” punch needle series appeared in galleries in March 2025, a reminder that the same tool you’re using for a first wall hanging is the one working artists use for gallery-scale work. The market signals reinforce this: Future Market Insights projects the global needlecraft patterns market will grow from USD 34 billion in 2025 to USD 63.8 billion by 2035, a CAGR of 6.5%. What reads as a trending hobby has serious, sustained depth.
One Needle, One Hour, One Piece You Made Yourself
Punch needle has a genuinely low barrier to entry – lower than most fiber arts, lower than most people expect from something that looks this good. The first session is achievable without any prior experience. Mistakes pull out cleanly. The rhythm takes over quickly. And the result, even from a beginner, is something you actually want to put on a wall.
The compatibility problem is real but entirely solvable. Getting the right needle, the right fabric, and the right yarn in the same package before you sit down removes the most common reason people give up before they start. After that, the only thing between you and a finished piece is a free afternoon and a simple design.
Start small. Get the fabric drum-tight. Let the rhythm do the rest.