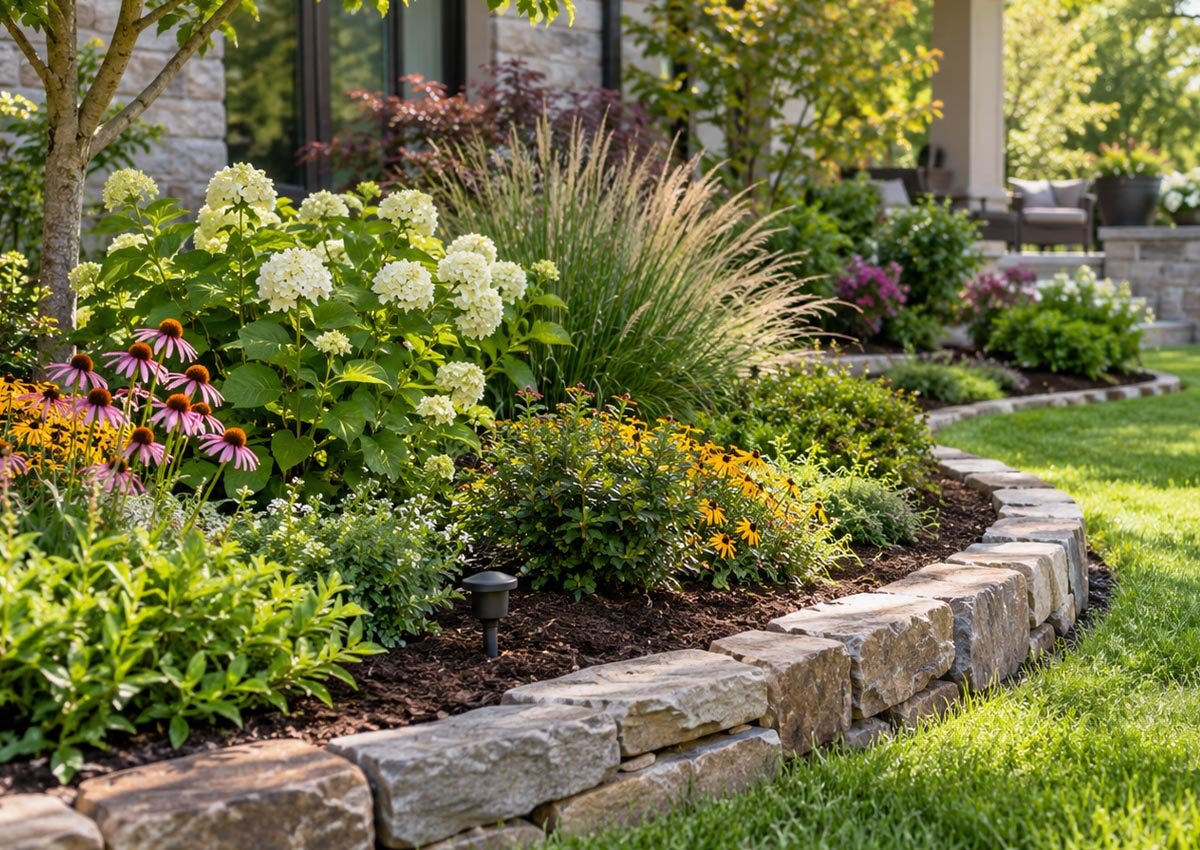
There’s a moment every gardener knows. You’ve got healthy plants, decent mulch, a lawn that’s mostly cooperating, and yet something is off. The yard looks busy instead of polished. Nine times out of ten, the missing ingredient is a clean line. Professional landscapes almost always have crisp boundaries between the lawn, the beds, and the paths, and the easiest way to get that same look at home is with edging stones.
Stone edging does something plastic and metal borders can’t. It adds weight, texture, and a sense of permanence. It reads as intentional design rather than maintenance. The good news is you don’t need a landscape architect or a masonry crew to get there. Here are seven stone edging approaches, roughly ordered from easiest to most ambitious, that can transform how your whole yard reads.
1. The Classic Soldier Course
Take flat stones, bricks, or pavers and stand them upright in a tight row, end to end. That’s a soldier course, and it’s the single most popular stone edging style for a reason. It creates a clean, slightly raised line that clearly separates bed from lawn, and it works with almost any home style.
The installation is beginner-friendly. Dig a shallow trench a few inches deep, add an inch of sand or crushed stone for drainage, set your stones upright, and backfill. The stones should sit slightly above soil level, roughly an inch or two, enough to stop mulch from spilling over but low enough that the lawn mower can run close.
Uniform materials like brick or rectangular pavers give a formal look. If you want something softer, use slightly irregular stones of similar height. The small variations keep it from feeling too rigid.
2. Flat Fieldstone Laid Horizontally
For a more casual, cottage-garden feel, flat stones laid on their edges in a horizontal line are hard to beat. Think of flagstone pieces or flat fieldstone set side by side like books leaning on a shelf, sunk so the tops sit just above grade.
This style suits naturalistic plantings, pollinator gardens, and yards where you want the edging to blend in rather than stand out. Because the stones vary in size and shape, you have flexibility on curves. Gentle arcs are easy to follow without cutting anything.
The one thing to watch is level. Stones set at slightly different heights look charmingly rustic. Stones set at wildly different heights look like a tripping hazard. Take the extra ten minutes per section to keep the tops reasonably consistent.
3. Stacked Stone for Raised Bed Borders
If your beds sit on heavy clay, drain poorly, or you simply like the look of elevated planting areas, stacked stone edging turns a flat bed into a raised bed. You don’t need mortar for beds under about a foot tall. Dry-stacked stone, where gravity and good stone selection do the work, has been used in walls for centuries.
The trick is to think like a wall builder even at a small scale. Place your biggest, flatttest stones at the base, stagger the joints like brickwork, and tilt each course slightly back toward the bed. Cap the top row with your widest, most attractive stones.
A raised stone bed also solves practical problems. Soil warms earlier in spring, drainage improves, and you won’t be bending over as far to weed. For vegetable gardeners and anyone with back problems, that last point alone justifies the project.
4. Granite Cobbles for Old-World Charm
Granite cobbles, sometimes called Belgian block, are those chunky, rounded-ish stones you see edging historic streets and old city gardens. They’re not cheap, and installing them is real labor, but nothing else delivers the same sense of age and permanence.
Cobbles shine as driveway borders, along front walkways, and anywhere you want the landscape to feel established. They pair especially well with brick homes and colonial or craftsman architecture.
Because cobbles are deep blocks rather than thin stones, they resist heaving and shifting better than almost any other edging option. Set them in a trench with compacted base material and they’ll outlast most of what’s in your yard. This is the choice when you want to install something once and never think about it again.
5. Mortared Stone Edging for a Finished Look
For a truly permanent, formal border, mortared stone edging is the top of the line. Stones are set in a concrete footing and bonded with mortar, creating a continuous curb that will not shift, heave, or wander for decades.
This is the approach to consider along front foundations, around formal entry gardens, and on properties where you want a tailored, estate-style appearance. It’s also the most skill-intensive option on this list. If you’ve never worked with mortar, this is the one project worth hiring out, at least for the visible joints.
A middle path exists, too. Many homeowners mortared-set only the end stones and corners of a run, anchoring the design, while setting the middle stones dry. You get stability where it matters most and save on materials and effort.
6. Sunken Stone Edging for a Mow-Over Border
Here’s the one nobody talks about enough. Set flat stones flush with the lawn, top of the stone level with the grass, and you create an invisible border that your mower can ride right over. No string trimming along the bed line, ever.
This style, sometimes called a mowing strip, is a favorite of low-maintenance gardeners. The stone strip gives your mower wheels a clean surface to travel on, and the crisp stone-to-grass line looks sharp all season without any work.
The installation demands more precision than the other styles because flush is a tight target. Dig the trench, set a string line, and check each stone with a level against the surrounding grade. A stone sitting a quarter inch high will get clipped by the mower blade, and one sitting low will collect soil and grass clippings until it disappears. Take your time and it pays off every single mowing day for years.
7. Mixed Stone and Gravel Edging
The last idea is less a pattern and more a design move. Combine edging stones with a narrow band of decorative gravel to create a two-material border that looks especially deliberate. Picture a row of flat stones defining the bed, then a 6 to 12 inch gravel strip between the stones and the lawn.
The gravel strip does quiet work. It catches soil and mulch that would otherwise wash onto the grass after heavy rain, gives you a dry place to step while working in the bed, and adds a texture contrast that makes both materials look better. River rock or pea stone both work, depending on whether the look you want is chunky or soft.
This approach suits modern and desert-inspired landscapes especially well, but it adapts to almost any style depending on the stone colors you choose.
A Few Tips No Matter Which Style You Pick
Whatever direction you go, a few fundamentals make the difference between a border that looks professionally done and one that looks like a weekend afterthought.
First, prep the base. A trench with compacted sand or stone dust underneath prevents sinking and heaving. Skipping the base is the number one reason stone edging ends up wavy by year two.
Second, plan for curves before you buy. Gentle curves flatter most yards more than straight lines, but tight curves require smaller, more flexible stones. Lay a garden hose along your intended line and live with it for a few days before committing.
Third, buy a little extra. Stones break during cutting, and matching a specific color or size two years later is surprisingly hard. Ten percent extra in the garage saves real headaches.
Finally, look at your home’s exterior before choosing stone color. The best edging doesn’t match your plants, it complements your house. Warm brick homes pair with tans and buffs, gray siding pairs with blue-grays and granite tones.
The Bottom Line
Professional landscaping rarely comes down to exotic plants or expensive features. It comes down to clean lines, consistent materials, and details that show intention. Stone edging delivers all three in a single weekend project. Pick the style that matches your yard’s personality, prep the base properly, and you’ll have a border that quietly upgrades everything around it for decades.