Key Takeaways
- Use a connected color palette rather than choosing every room in isolation.
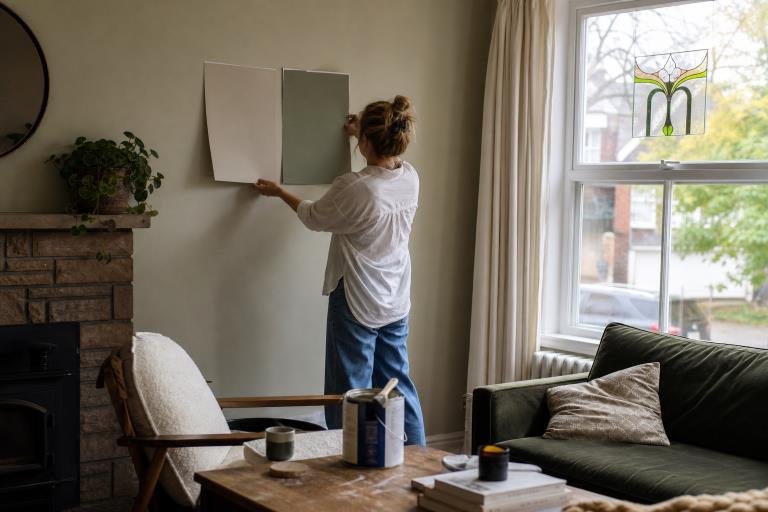
- Test samples in each room’s natural and artificial light before committing.
- Repair, clean, sand, and prime surfaces before painting.
- Match the paint finish to the room’s traffic, moisture, and cleaning needs.
- Follow a room-by-room work order to limit mess and interruptions.
- Provide ventilation during painting and while fresh coatings dry.
Painting an Ottawa home is one of the most effective ways to make it feel cleaner, brighter, and more personal. From compact downtown condos to older homes with detailed trim and newer suburban layouts, a thoughtful plan helps every space feel connected. Homeowners working with Oliver Painting Ottawa Painters, or taking on part of the project themselves, can get better results by making key color, preparation, and scheduling decisions before opening the first can. Ottawa’s long heating season, changing daylight, and occasional indoor humidity make preparation especially important. A good paint plan accounts for the light in each room, the surfaces already in place, and the practical demands of busy family areas, entryways, kitchens, and bathrooms.
Why a Whole-Home Paint Plan Helps
A whole-home plan does not mean using a single color on every wall. It means choosing shades that make visual sense together as people move from room to room. For example, a soft neutral hallway can connect a more energetic kitchen with a calm bedroom without making the home feel repetitive. Planning also helps control purchases. When ceilings, trim, doors, walls, and accent areas are listed before shopping, it is easier to estimate material quantities, avoid mismatched sheens, and keep enough of each color for later touch-ups.
Step One: Review the Home Before Choosing Paint
Start by looking at what cannot easily be changed. Flooring, cabinetry, countertops, tile, stone, and large furniture pieces should influence the wall colors around them. Paint should support these fixed finishes rather than compete with them.
- Notice the direction and amount of natural light from windows.
- Turn on lamps and ceiling fixtures to see how the bulb color changes the walls.
- Consider room size, ceiling height, and the amount of uninterrupted wall space.
- Check for stains, cracks, peeling paint, dents, and signs of moisture.
- Review bedding, curtains, rugs, and large decor in bedrooms and living areas.
Step Two: Build a Simple Color System
A manageable palette can be built around three levels. Choose one flexible main color for shared spaces, two or three supporting shades for secondary rooms, and a few accent colors for doors, built-ins, or focal walls. Repeating an accent in small details, such as a powder room vanity wall and a nearby interior door, can create continuity without making every room identical.
Living Room
Choose adaptable colors that work with furniture that may change over time. Warm off-whites, soft greiges, muted greens, and gentle blue-greys can all work when they suit the fixed finishes. A feature wall can add depth, but it works best when it highlights a fireplace, built-in, or clearly defined focal point.
Kitchen and Dining Area
Start with cabinets, backsplash, counters, and flooring. Kitchens benefit from finishes that tolerate regular cleaning, steam, and the occasional food splash. In an open or adjacent dining space, use a related color with a slightly different depth or undertone rather than forcing an exact match.
Bedrooms
Bedrooms are a good place for softer, more personal choices. Consider the bedding, curtains, and larger furniture before selecting paint. Darker colors can be effective behind a bed or in rooms with generous daylight, while lighter shades can keep smaller rooms feeling open.
Bathrooms, Hallways, and Utility Areas
Bathrooms need attention to ventilation and any existing water damage before painting begins. Hallways, stairways, mudrooms, and laundry rooms benefit from durable, washable finishes because they are frequently used. In a home office, avoid a strong color directly behind a monitor if it creates distracting visual contrast or glare.
Choosing the Right Paint Finish
- Flat:Helps disguise minor surface variation but is generally less washable.
- Eggshell:Provides a low-sheen look suitable for many living spaces.
- Satin:Offers greater washability for active rooms and high-contact walls.
- Semi-gloss:Commonly suits trim, doors, baseboards, and moisture-prone areas.
- Gloss:Creates a pronounced finish but can reveal surface flaws.
Always check the product label because performance and recommended uses vary by manufacturer.
Prepare Surfaces Before Painting
- Remove dust, grease, and loose paint.
- Fill nail holes, dents, and small cracks.
- Sand repairs smooth and removes sanding dust.
- Prime stains, bare drywall, patched areas, and major color changes as needed.
- Protect floors, fixtures, furniture, and trim.
- Apply painter’s tape only to clean, dry surfaces.
Fresh paint cannot solve an active leak, unstable drywall, mold growth, or ongoing condensation. Fix the underlying issue first, then allow the area to dry fully before repairs and repainting.
Plan the Work in the Right Order
For a multi-room project, complete repairs first, then paint ceilings, walls, trim, and doors in that order. Work from rooms farthest from the main exit toward the areas used most often. Finish one room before relocating tools and supplies to the next, and keep labeled leftover paint for small future repairs.
Paint, Ventilation, and Indoor Air Quality
Paints and related products can release volatile organic compounds, so increasing ventilation while using products that emit VOCs is a sensible part of any indoor project. Open windows when conditions allow, use a fan to direct air outside, follow label instructions, and keep children, pets, and sensitive occupants out of active work areas. For older homes, take extra care before sanding or scraping unknown coatings. The recommended remodeling practices include correcting moisture problems, containing dust, and using exhaust ventilation to reduce the spread of pollutants throughout the home.
Common Mistakes to Avoid
- Choosing a color from a small chip alone.
- Skipping cleaning, repairs, or primer where it is needed.
- Using one sheen for walls, trim, and high-moisture areas.
- Applying another coat before the first is ready according to the label.
- Forgetting ceilings, doors, baseboards, and railings in the overall plan.
- Starting a large project without a room-by-room schedule.
When to Call a Professional
Professional help can be worthwhile for high ceilings, stairwells, extensive drywall repairs, wallpaper removal, widespread peeling paint, water-stained surfaces, or projects with a firm deadline. It can also be the safer choice when older coatings may require specialized assessment or containment.
Frequently Asked Questions
Should every room use the same paint color?
No. Shared areas can use a unifying shade, while bedrooms and accent spaces can use related colors with their own character.
Is primer always necessary?
Not always, but it is particularly useful over stains, patches, bare drywall, glossy surfaces, and significant color changes.
Can a home be painted one room at a time?
Yes. A phased approach is practical when time, furniture, or daily routines make a full-home project difficult.
Conclusion
A successful Ottawa painting project begins with a clear plan, not a roller. By testing colors, selecting appropriate finishes, and carefully preparing every surface, homeowners can create a cohesive result that looks considered from the entryway to the smallest utility room. Planning the order of work can also reduce unnecessary touch-ups and help keep different areas consistent throughout the home. Before painting, it is useful to inspect walls for cracks, holes, stains, loose paint, or other surface conditions that may require attention. Protecting floors, trim, fixtures, and furniture can help limit accidental splashes and make cleanup easier. Homeowners should also consider lighting, room use, existing finishes, and how colors will appear at different times of day. With thoughtful preparation, suitable materials, and a logical work sequence, an Ottawa painting project can be easier to manage and produce a finish that remains practical for everyday living.