A newly built home in Northern Virginia can be an exciting milestone, whether it is a townhome near a growing transit corridor or a detached house in a newer suburban community. It is also a complex project completed by multiple trades over many months. Scheduling a new construction inspection in Northern Virginia at meaningful points in the build can help buyers review work while important components are still accessible.
A property inspection is generally a visual, non-invasive assessment of a home’s condition at a particular time. As home inspection basics explain, an inspection report is different from an appraisal and is not the same as a code-compliance inspection performed by a local authority. Each role can be useful, but each has a different purpose.
Why New Homes Still Need Careful Review
“New” means the materials and systems have recently been installed. It does not guarantee that every detail is complete, correctly located, or free from damage. Construction schedules, weather interruptions, product substitutions, and coordination between trades can all create opportunities for missed details. Northern Virginia’s periods of heavy rain, humid summers, and cold winter conditions also make water management, exterior sealing, drainage, and system performance worth reviewing carefully.
Before arranging access to the property, read the purchase agreement and communicate with the builder or site representative. Some builders set specific inspection windows, require advance notice, or restrict site access for safety reasons. Confirm what inspections are permitted, when they may occur, and how concerns must be submitted.
Build a Practical Inspection Timeline
A phased approach is more useful than trying to identify every concern in one visit near closing. A simple four-point plan can be adapted to the construction schedule:
- Review accessible foundation and site work before it is covered.
- Inspect after framing and rough electrical, plumbing, and HVAC work are installed, but before insulation and drywall.
- Complete a final inspection near completion and before closing.
- Schedule a warranty review before the builder’s reporting deadline.
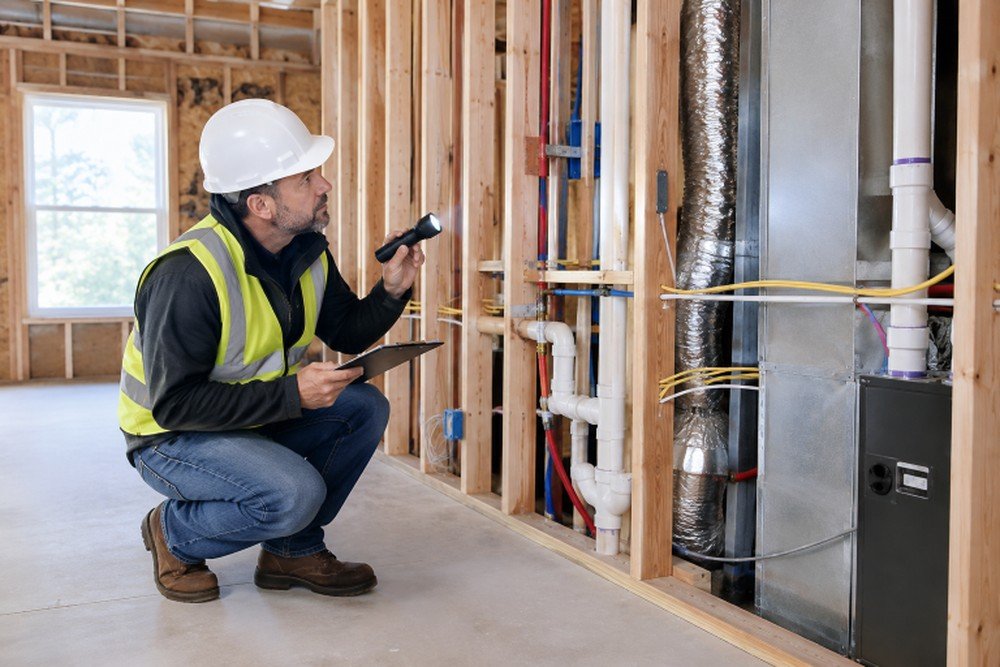
The pre-drywall stage is especially important because it is often the last practical opportunity to see work inside walls and ceilings. A recent guide to pre-drywall inspections in new construction homes similarly notes that framing and rough mechanical systems are visible before the walls are closed.
What to Review Before Foundation Work Is Covered
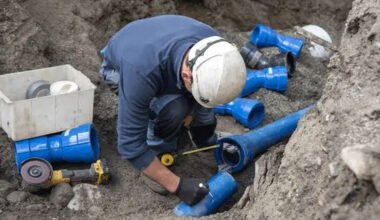
Not every buyer will have access during excavation or foundation preparation, but an early review can be useful when allowed. Compare visible work with the approved plans and written specifications available to you. Note obvious standing water, soil erosion, inaccessible drainage paths, or site conditions that should be discussed with the builder.
When visible and safely accessible, an inspector may review foundation forms, reinforcement, anchor locations, plumbing penetrations, and other exposed elements. If there is a concern involving structural design, soil movement, or engineering details, the appropriate next step may be consultation with a qualified engineer or another licensed specialist. Ask the builder what will be covered next and when that work is scheduled.
The Pre-Drywall Checkpoint
Once framing is complete and rough systems are installed, the home’s internal layout is easier to understand. This checkpoint is useful for identifying visible conditions, confirming selected locations, and documenting areas that will soon be concealed.
Items to Review Before the Walls Close
- Framing alignment, headers, beams, visible connectors, and any framing members that appear cut, split, or damaged.
- Electrical box locations, wire routing, protective plates, planned switches, outlets, lighting, and dedicated appliance connections.
- Plumbing supply lines, drain and vent piping, supports, penetrations, and proposed fixture locations.
- HVAC duct routes, supply and return locations, equipment placement, and visible sealing or insulation work.
- Window and exterior door openings, flashing details, exterior water-control layers, and penetrations for vents or utilities.
- Room layouts, cabinet walls, appliance spaces, and locations for wall-mounted televisions, fixtures, or storage systems.
How to Document Concerns
Good records turn a vague observation into a trackable request. Take one wide photo showing the room or elevation, then take close photos that show the detail. Label images by date, floor, room, and issue. Save plans, selection sheets, change orders, inspection reports, emails, and builder responses in one digital folder.
For example, a photo labeled “Second Floor Hall, October 14, outlet location” is far easier to discuss than an unlabeled image of a wall. In a simple tracking sheet, record the date found, location, description, photo number, person notified, requested action, target date, and repair status. Submit repair requests through the builder’s required written process rather than relying only on a verbal conversation.
The Final Inspection Before Closing
The final review should go beyond paint touch-ups and cosmetic marks. It is the time to assess accessible systems and compare the finished home with signed selections, plans, and documented changes. Create a written punch list for incomplete or unsatisfactory items, and ask how each item will be resolved.
Suggested Final-Visit Checklist
- Open and close exterior doors, interior doors, and accessible windows.
- Test accessible lights, switches, receptacles, fans, appliances, and garage door operation.
- Run faucets, flush toilets, check under sinks, and look for visible leaks or drainage concerns.
- Operate heating and cooling equipment when conditions and builder procedures allow.
- Review stairs, railings, guards, handrails, attic access, garage areas, and visible safety features.
- Inspect grading, downspout discharge, exterior finishes, walkways, roof edges visible from the ground, and water-stained areas.
- Confirm that installed fixtures, flooring, cabinets, countertops, and appliances match the signed selections.
The Warranty-Period Inspection
Some concerns become easier to identify only after the home has been occupied through changing seasons. Before the warranty deadline, review doors that stick, recurring drywall cracks, floor movement, moisture marks, drainage problems, caulk separation, HVAC comfort concerns, and water intrusion around windows or exterior penetrations. Check the warranty documents for the exact deadline, notice requirements, and any exclusions.
Do not wait for a perfect list if an important concern appears. Report it promptly in writing, retain proof of submission, and continue adding documented items as needed under the builder’s stated process.
Questions to Ask the Builder
- Which inspection stages are built into the construction schedule?
- When may an independent inspector access the home?
- Who will coordinate corrections found before closing?
- How should punch-list and warranty requests be submitted?
- Which systems and appliances carry separate manufacturer warranties?
- What manuals, permits, warranty documents, and maintenance information will be provided at closing?
- What is the process for urgent water, electrical, heating, or safety concerns?
Common Mistakes to Avoid
- Waiting until the final walkthrough to begin reviewing the home.
- Assuming a municipal inspection addresses every workmanship or finish concern.
- Accepting verbal assurances without a written record.
- Failing to compare the finished home with selections and change orders.
- Taking photos without dates, room names, or context.
- Ignoring small leaks, drainage concerns, recurring cracks, or unusual system noises.
- Missing a warranty notice deadline.
Conclusion
A staged inspection plan gives Northern Virginia buyers more than one opportunity to review a new home before and after closing. Review visible work while access is available, document concerns clearly, keep repair commitments in writing, and use the warranty period intentionally. That straightforward process can help turn a complex construction project into a better-organized transition into a new home.