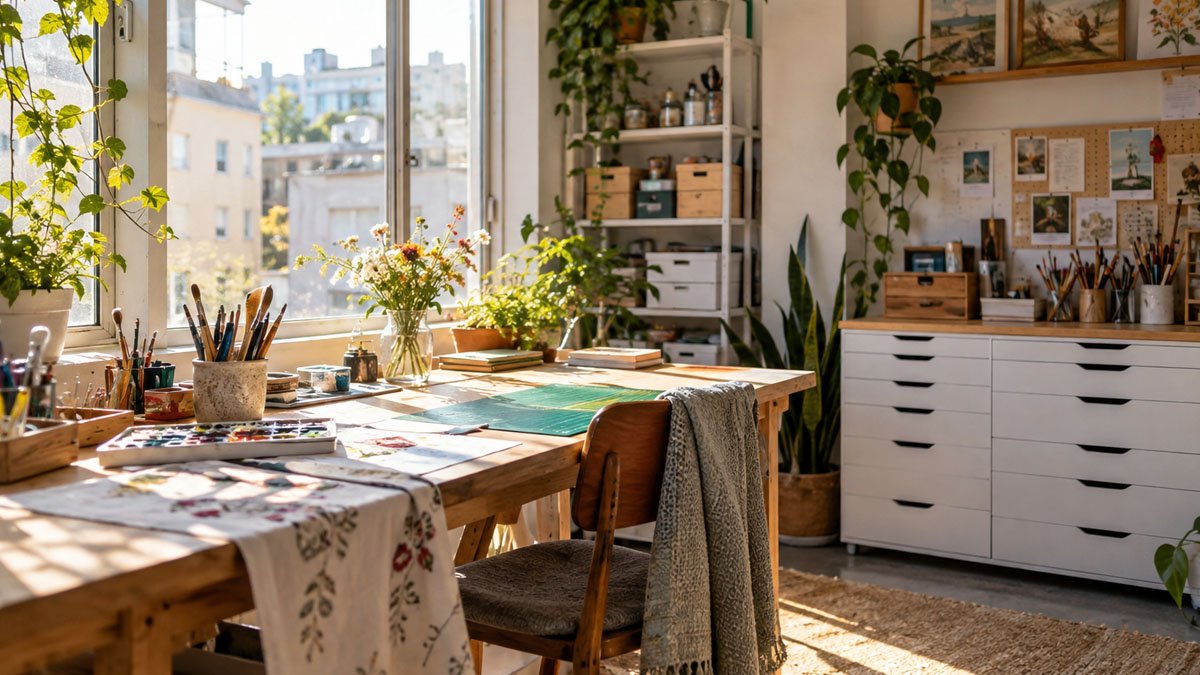
Most hobby rooms fail quietly. Nobody decides to abandon them. The sewing machine just stops coming out of the closet, the paints dry up, the workbench becomes a shelf for boxes. When people talk about why they gave up on a craft space, they usually blame a lack of time. More often, the real culprit is the room itself.
A hobby space that gets used has a few things in common regardless of the craft: short distance between intention and action, light you can work under, storage that matches how you actually use your materials, and a door you can close on the mess. Whether you are carving a corner out of a spare bedroom or setting up a purpose-built sun studio in the backyard, the layout principles are the same. Small-studio living has taught designers a lot about making tight spaces work hard, and those lessons translate directly to hobby rooms.
Here is what separates a space that gets used weekly from one that gets used twice and forgotten.
Lesson One: Reduce the Steps Between Wanting and Doing
The single biggest predictor of whether a hobby space gets used is friction. Every step between you and your craft is a chance to lose momentum.
Think about how your hobby actually starts. If you paint, it starts with pulling out the easel, the brushes, and the palette, then filling a water jar. If you quilt, it starts with clearing a surface, laying out the cutting mat, and finding the rotary cutter. Count the steps. If getting started takes more than five minutes, the hobby will lose to the couch most evenings.
The fix is to design the room around a ready state. This means:
Leave the setup standing. A hobby room earns its keep by letting you leave a project mid-stride. The half-finished painting stays on the easel. The cutting mat stays out. The pattern pieces stay pinned. This is the entire argument for a dedicated room over the kitchen table, and if your layout does not allow a permanent setup, you have built a storage room, not a studio.
Keep the core kit within arm’s reach of the work surface. The tools you use every session belong on a wall rack, a pegboard, or an open shelf directly above or beside where you work. Things you use monthly can live in a drawer. Things you use once a year belong in the attic.
Put the entry where the work is. In a small studio, the door should open into a clear path that leads straight to the primary work zone. If you have to sidestep a stack of bins to reach your chair, the room will slowly train you not to go in.
Lesson Two: Design Around One Primary Work Surface
Small apartments work when they are organized around a single anchor, usually the kitchen counter or the bed. Hobby rooms are the same. Pick one primary work surface and give it the best light, the best access, and the most clearance.
The size of that surface depends on the craft, but a good rule of thumb is that you need more depth than you think. A workbench that is 24 inches deep feels cramped the moment a project spreads out. Thirty inches is better. If the room allows, a surface of six to eight feet long handles most hobbies, from laying out fabric to assembling model kits to sorting a coin collection.
Resist the urge to add a second work surface unless the hobby genuinely needs one. A painting studio needs a clean table separate from a messy one. A jewelry maker might want a soldering station apart from a design desk. But most hobbyists do one thing at a time, and a second table usually becomes a dumping ground within a month. One good surface, kept clear, beats two cluttered ones.
Lesson Three: Let the Light Do the Heavy Lifting
Light is the most underrated element in a hobby room, and the most common mistake is treating it as decoration rather than infrastructure.
Craft work is detail work. Color matching, fine cutting, reading pattern marks, inspecting finishes. All of it depends on light quality. Overhead bulbs create pools and shadows, and a single window lights one side of the room while the other side sits in comparative gloom. Anyone who has tried to match thread colors in bad light knows how quickly this becomes a real problem, not a comfort complaint.
This is where studio design borrowed from small-studio architecture helps most. The best small workspaces pull daylight from high in the room rather than relying on one big wall window. High transom windows do something clever: they spread light across the ceiling, which then diffuses down over the whole room evenly, instead of beaming a hard shaft of light across one work surface and casting glare on everything else. Painters, quilters, and anyone who works with color specifically want this kind of even, indirect daylight, because it shows true color without the glare of direct sun.
A few practical light rules for any hobby room:
Put your main work surface perpendicular to the light source, not facing it. Working with a window behind you lights your work. Working facing a window lights your eyes and blinds you.
Aim for light from two directions. One window makes a room feel like a cave by 4 p.m. in winter. Windows on two sides, or a high window plus a side window, keep the room usable all day.
Supplement with task lighting, but do not rely on it. A good daylight-balanced lamp at the work surface handles evening sessions, but a room that needs lamps at noon will not get used as often as one that does not.
Lesson Four: Store Things Where You Reach for Them
Storage design in small studios follows a simple logic: the frequency of use determines the location. Studio apartment designers call this zoning, and it works because it matches storage to behavior instead of to category.
Open storage for the everyday. Closed storage for the ugly stuff. High storage for the rarely used. That is most of what you need to know.
For a hobby room, a few specifics matter. Vertical storage is your friend in a small footprint, so one full wall of shelving holds more than freestanding units scattered around the room. A wall-mounted pegboard above the work surface keeps hand tools visible and reachable, and visible tools get used while hidden tools get forgotten. Clear bins beat opaque ones for anything you need to find quickly, though a row of matching labeled bins looks calmer and works nearly as well.
One more thing that small-studio living teaches: leave at least 20 percent of your storage empty on day one. A hobby grows. Materials accumulate. A room that starts 100 percent full has nowhere to put the next project, and that is when the clutter starts creeping toward the work surface.
Lesson Five: Give the Mess Somewhere to Go
The hobby rooms that get abandoned are often the ones that make cleanup feel like a second chore. Design for the cleanup as deliberately as you design for the work.
A full-height trash point near the work surface, a spot for the vacuum or a broom, and a defined home for the things that migrate, like scissors and tape, all reduce the friction of quitting for the night. Some hobbyists keep a rolling cart that serves as a landing zone during a session and gets wheeled into a corner afterward. That one piece of furniture can be the difference between a room that stays functional and one that drowns in its own projects.
If the room is inside the house, a door matters. Being able to close off a half-finished project is what keeps household peace and keeps the project alive. If the room is a detached studio, the same principle applies to the walk back to the house. A five-minute end-of-session routine, built into the layout, keeps the room ready for the next session.
Lesson Six: Make It Somewhere You Want to Be
Function gets you into the room. Comfort keeps you there.
A chair you can sit in for three hours is worth more than any storage system. A small sound setup, a heater or fan depending on season, and a place for a mug of coffee cost almost nothing and change how the room feels. Temperature is a real factor for detached spaces in particular, and insulating the walls and adding a small heat source extends a backyard studio from a three-season room to a year-round one without much fuss.
There is also something to be said for a room that looks like a place where good work happens. A little intentionality, matching bins, a clean wall for pinning inspiration, a plant in the window, signals to your brain that this is a real workspace. It sounds trivial until you notice that you gravitate toward rooms that feel finished and avoid rooms that feel provisional.
The Takeaway
A hobby room is not a storage problem, it is a behavior problem. The rooms that get used are the ones designed around how a person actually starts, works, and stops. Reduce the steps to getting started, give the craft one honest work surface under good light, store materials by frequency of use, plan for the mess, and make the room comfortable enough to linger in.
Do that, whether in a converted closet or a purpose-built studio in the yard, and the hobby stops competing with the couch. It starts waiting for you instead.